Created by Stacey Cogswell
Copyright Stampin'Up!
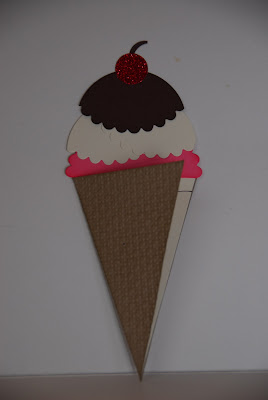
Here is another fun project made with the Petal Cone Die. I saw a version of this card made by Jackie Topa, but instead of having the card slide out, I decided to have my card just open. It uses only one box piece textured with the Square Lattice Impressions folder to create the "cone". The chocolate and vanilla "ice cream" was made by first punching a 2 1/2" circle and then placing this punched circle onto the Petal Cone Die over the half scalloped area making sure to cut only the scallop area with the die. (Check out Jackie's blog to see how to make the "Ice Cream" shapes in more detail. A second box piece was cut with the Petal Cone Die and then cut in half to create the area inside of the card for the greeting. Punch a 1/2" circle out of red glitter paper and you've got the finishing touch of your card.....a glittery cherry!
Products Used to Create this Card:
Stamp Set: A Word for You
Card Stock: Crumb Cake, Chocolate Chip, Rose Red, Very Vanilla and Glitter Red
Ink: Chocolate Chip and Rose Red pad/marker
Accessories: Big Shot with Square Lattice Impression folder and Petal Cone Die, 3/4" Circle punch, 2 1/2" Circle punch, sponge and blender pen.
Do you know an easy way to get two colors on one stamp? This is how I do it. Ink up the stamp with the first color then remove the ink from the area you want another color with the blender pen. Ink up this area using a marker in the second color, huff on the stamp to re-wet the ink and stamp.
Smiles,
Stacey


No comments:
Post a Comment