by Stacey Cogswell, Independent Stampin'Up Demonstrator

Saturday, April 30, 2011

Card Contest Share #2

Created by Stacey Cogswell
Copyright Stampin'Up!


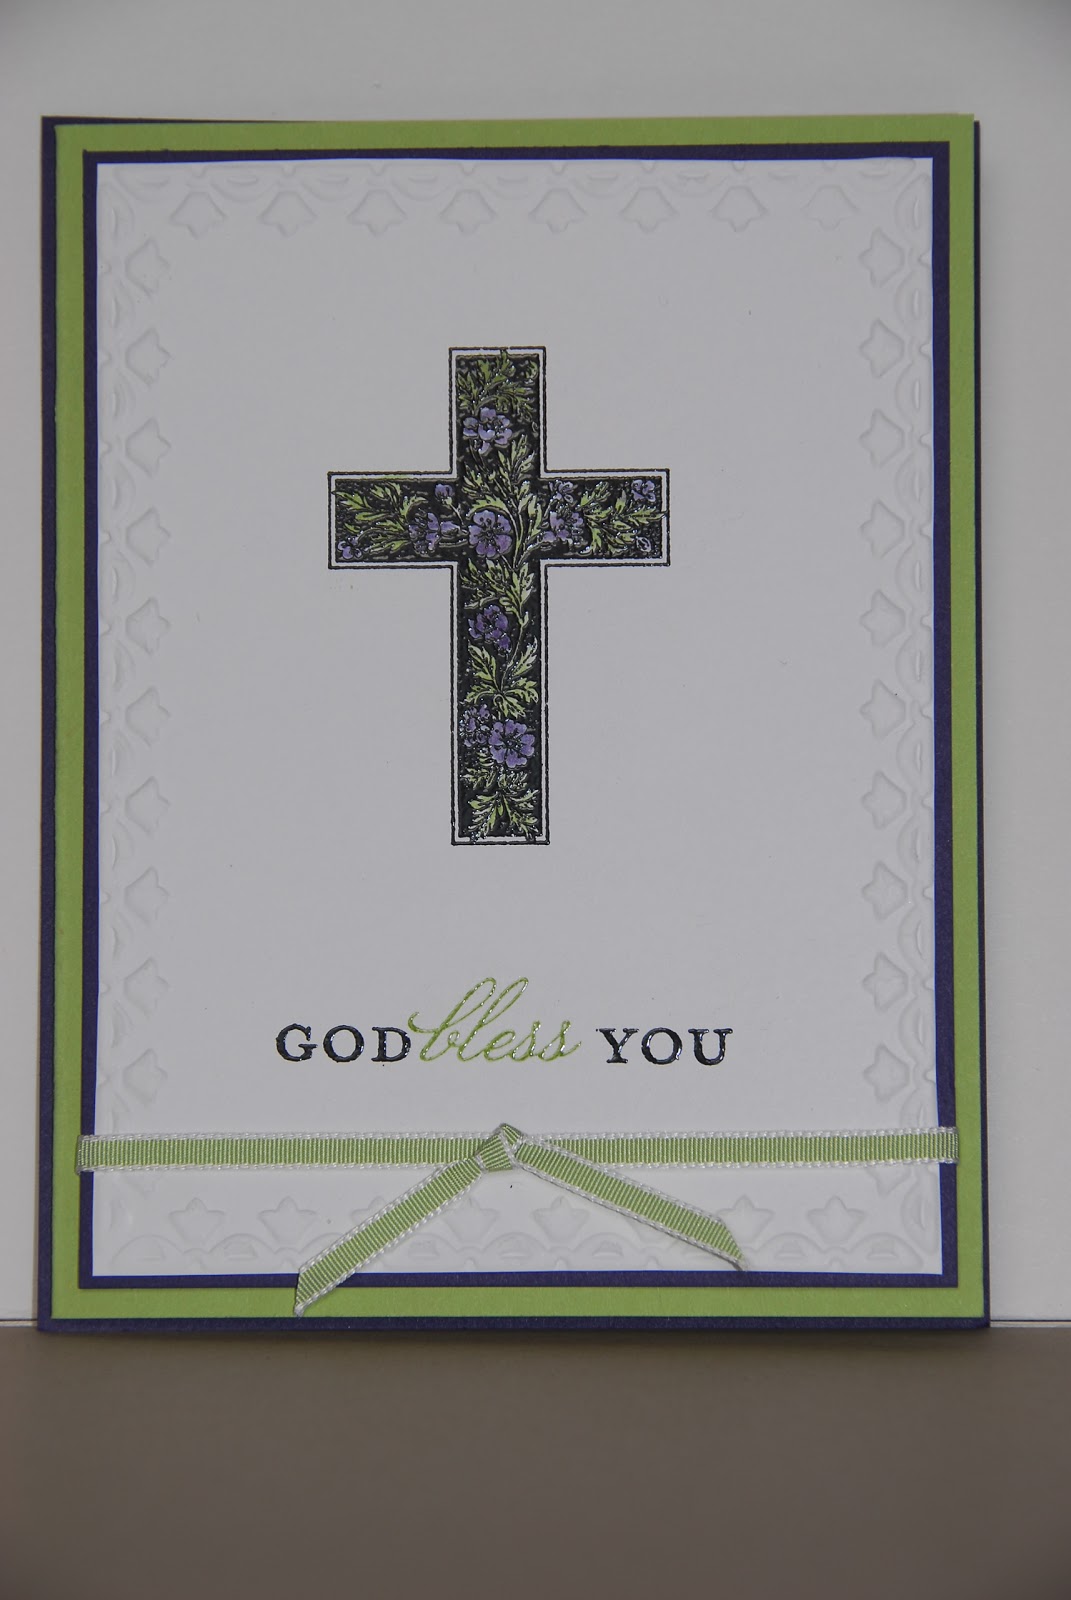
This was a super simple, but elegant at the same time type of card..  I wanted to have the cross to be the central focal point without a lot of other stuff distraction from it.  I first dry embossed the front piece of card stock with the Framed Tulip embossing folder. Next, I heat embossed the cross with black embossing powder and then colored in the leaves/flowers with markers.  The greeting was stamped twice, once with VerseMark (heat embossed with black embossing powder) then using my Stamp-ma-jig for positioning, I stamped "blessed" with VerseMark and green ink (heat embossed with clear embossing powder).  So, there you have it.  Super easy, but beautiful.

Products used to create this card:

Stamp set: Crosses of Hope (wood $18.95 117136 or clear $14.94 120567)
Card stock: Whisper White, Pear Pizzazz and Concord Crush
Ink: VersaMark and Pear Pizzazz
Markers: Pear Pizzazz and Concord Crush
Accessories: Big Shot with Framed Tulips embossing folder, Black/Clear embossing powder, heat tool and Certainly Celery 1/8" Taffeta ribbon

Enjoy!
Smiles,
Stacey

Thursday, April 28, 2011

Card Contest Share #1

Last month I made several cards for the Paper Crafts Stamping Royalty Card contest, but none of my cards were chosen as a winner.  Bummer!  Oh well, you can't always know what the judges are looking for, so I'll just try again next year.  Anyway, now that I know they didn't win I can take the pictures out of hiding and share then with you. 

The first one was one of my favorites.  I thought the die cut scalloped square shape, which is about 4x4 square, would give this card a different, but fun look and of course who doesn't love the Create a Cupcake stamp set!  I also had to add a cherry to the top of my cupcake using my super easy to use Build a Cupcake punch.  If you haven't seen or used these fabulous products....you only have until April 30th to order them......don't miss out!

Created by Stacey Cogswell
Copyright Stampin'Up!


Products used to create this card:

Stamp sets:  Create a Cupcake (wood $22.95 121915 or clear $16.95 121982)
                    A Word for You (wood $21.95 117032 or clear $16.95 120528)
Classic Ink: Early Espresso and Rose Red
Punch: Build a Cupcake ($16.95 121807)
Card Stock: Early Espresso, Rose Red and Whisper White
Designer Series Paper: Sweet & Sour Specialty
Accessories: Big Shot with Bigz Scallop Square die.

Well, hope you enjoy this card and will try using a different shape to your next card.

Smiles,
Stacey

Tuesday, April 26, 2011

Zach's a Medalist!

Hello everyone!  It's been awhile since I've posted, not because I haven't wantd to but because I've been so busy!  From Hood River one weekend to Seattle the next and then stamp camp, I've hardly had a chance to catch my breath.  Then to top it off, Zach and I can sown with somekind of terrible stomach flu that knocked us off our feet for over a week!  But that's enough of that stuff.  I have exciting news.........Zach won the Silver Medal!
Zach
Silver Medalist
2011 Artistic Roller Skating
Invitational
Auburn, WA

As parents we were so happy to see him skate his best and win the silver medal.  It was a proud moment.  Now, he has his eyes set on the Regional Roller Skating Meet in June and the Gold Medal!    

Smiles,
Stacey

Thursday, April 7, 2011

April Stamp Camp Projects

My life is so CRAZY busy right now and I'm so late in posting these pictures that I'm just going to keep it simple. I still one more project to complete, so you'll have to be surprised at camp!  I will do my best to post individual postings with information in the next week, but I can't make any promises.  Hope you like what you see and if you would like to come to camp on April 22nd to make all these projects, plus one that isn't pictured yet, please let me know.  I still have a lots of spots for the early Friday session, but the Friday night session only has a couple of spots.


Created by Stacey Cogswell
Copyright Stampin'Up

 You will be making one bunny card and one treat pouch.

Created by Stacey Cogswell
Copyright Stampin'Up!

You will making one of each card and I will show you a really cool new technique called Spirelli to make the medallion on the one card.


Created by Stacey Cogswell
Copyright Stampin'Up!

This simple, but elegant card, features the Neural Patterns paper pack and I will show you how to make this folded "flower" from 7 punched scallops circles.

Sorry, I don't have a picture of the last project, but it will be cute.....I promise.  It will feature a new stamp set called "Four Frames" and new designer series paper.

So what do you think?  I hope you like what you see. 
Again, I will do my best to post all the details for each project in the next week or so.  

Have a great rest of the week.

Smiles,
Stacey

Monday, April 4, 2011

Neutral Colors with Scallop Flower

Each month I create a one of a kind card for my son's piano teacher.  This is her April card and I'm really happy with how it turned out.  Five strips of designer series paper each punched with a different border punch, a flower created with eight circle scallops, an antique brad and a little edge ink sponging makes this card very elegant.

Products used to create this card:
Stamp set:  Crosses of Hope
Card Stock: Soft Suede and Crumb Cake
Ink: Soft Suede                                 
Designer Series Paper: Elegant Soiree                                               
Accessories: Antique brads, Baja Breeze seam binding                        
Two step Bird punch and sponge.

To make the flower; punch 8 scallop circles.  Lightly mist 7 of them with water, then fold each one in half, then half again and half again.  When you have all 7 folded, adhere then to the flat 8th scallop.  Sponge with ink and add brad.  A version of this card will be made at the April stamp camp.

Smiles,
Stacey

Saturday, April 2, 2011

Two Tags Birthday Card

Created by Stacey Cogswell
Copyright Stampin'Up!


I love the Two Tags Die, so when I saw a similar card on line I knew I would have to try to make one of my own.  This is a very simple card, but it looks like you spend hours creating it.  If you're like me, time can be hard to come by, so that's what is cool about die cuts, they can cut your production time down without impacting the final results.  This card only took about 10 minutes to make!

Products Used to Make this Card:

Stamp Set: Just Believe, greeting retired
Card Stock: Whisper White, Pear Pizzazz and Baja Breeze
Ink: Baja Breeze and Pear Pizzazz
Accessories: Big Shot with Two Tags Die and  finial Press Impressions folder, Pear Pizzazz seam binding, Blender pen, Circle Scallop punch, 1 3/8" Circle punch, 1 1/4" Circle punch, Pearls,Clear Embossing powder/Heat tool and Versa Mark ink.

The Flower image was stamped with Versa Mark, heat embossed and then colored with ink/blender pen.  Punch out with the 1 1/4" circle, matte with a punched 1 3/8" Circle and punched Scallop Circle then matte to the Two Tags die cut piece.  Only 2/3rds of the Whisper White piece was dry embossed to leave a smooth area to stamp the greeting.  This is done by only placing part of the paper in the folder and then running it through the Big Shot. 

Hope you like it!
Smiles,
Stacey